Clean Boot your Windows
Although Microsoft is diligent in making sure Windows 7 works well, not all hardware manufacturers and software publishers have the resources or motivation to provide products that operate flawlessly.
If the hardware and software in your PC are not working correctly, you need a way to boot up Windows 7 so you can find out which component is causing the problem. Learn how to perform a clean boot in Windows 7 to troubleshoot malfunctioning hardware and software.
Safe Mode vs. Clean Boot
A popular method of troubleshooting and diagnosing a PC is to boot into Safe Mode. Safe Mode loads Windows with a minimal set of drivers. For example, when you boot up into Safe Mode, Windows loads only a standard VGA video driver. This is why your PC is set to a very low resolution when you boot into Safe Mode.
A Clean Boot is a bit different from Safe Mode. With a Clean Boot, Windows 7 starts up in normal mode but without any non-Microsoft background applications and services. These background applications and services are what make Windows 7 behave the way it does. Most people are unaware that these elements of Windows are even running.
Starting Windows 7 with a Clean Boot is easy. You simply temporarily turn off all non-Microsoft services and restart your PC. When it boots up, only Microsoft services will be running, allowing you to step through turning on different services until you find the problem.
Performing a Windows 7 Clean Boot
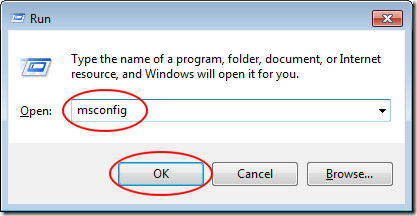
Log in to Windows 7 using an account that has administrative privileges Click on Start>Run. If you don’t have the Runcommand on your Start menu, you can alternatively hold down the Windows key on your keyboard and press the R key. With the Run dialogue window open, type in msconfig and click the OK button.
You should now be looking at the System Configuration window. Click on the Services tab.
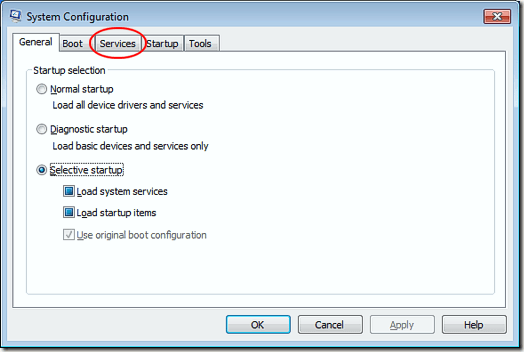
On the Services tab, you’ll notice a long list of services available on your PC. Some have checks next to them and some don’t. Those that do are scheduled to load automatically the next time Windows 7 boots up. This next step is extremely important so don’t skip it.

First, check the box labeled Hide All Microsoft Services. As its name implies, this will hide all Microsoft services on the list. Most if not all of these services are required for Windows 7 to function properly.
Next, click the Disable All button. By performing these two steps, you have effectively turned off all services from third-party software developers. All Microsoft services remain intact and ready to load when you reboot Windows.
Finally, click the OK button and reboot Windows 7. When you reboot, you may get messages that certain hardware and software are not unavailable. This is normal. In fact, by disabling these components in your PC, you can go back to theServices tab on the System Configuration window and turn on only those services known to be functioning properly. The rest you can turn on one at a time to troubleshoot the errors you were getting in Windows 7.
Different from Safe Mode, a Clean Boot lets you disable all non-Microsoft background applications and services to troubleshoot a PC running Windows 7. Once disabled, you can begin turning third-party services back on to diagnose your computer.
Just be sure to hide all Microsoft services before you use the Disable All button. Otherwise, you may encounter boot up errors when you reboot your PC.
No comments:
Post a Comment