Unable to Watch Videos on Netflix in Internet
Explorer
Watching
Netflix streaming media using Internet Explorer requires that you install
Microsoft Silverlight. At times you may see issues when watching Netflix
streaming media or installing Silverlight. You may experience one or more of
the following issues:
·
You may be prompted to
install Silverlight even though Silverlight is already installed
·
You may be unable to
view streaming media from Netflix
·
You may be unable to
install or uninstall Silverlight
The most common issue is that you’re not running
the latest version of Silverlight and you may be using a 64-bit version of
Windows or Internet Explorer, or your installation of Silverlight has become
corrupt.
First Step:
The
very first thing to do is to make sure you’re running the most current version
of Silverlight. To do this, follow these steps:
1. Click Start and type Silverlight in
the Search box, and then click Microsoft Silverlight from
the list of programs
For Windows XP users, click Start, All
Programs, and then click Microsoft Silverlight
2. On the About tab, see the
version number listed beside the Silverlight logo
3. The version should be 5.0.61118.0 or
higher.If the silverlight version you have is an older one, download the latest
version here .
4. Try uninstalling silverlight and re-installing
it.
5. Clean the silverlight installation using
Microsoft Fix It. Download the Microsoft Fix It here .
6. Log on as an Administrator on Windows 7 and Windows
Vista
Logging
on as an Administrator can allow Silverlight to function properly. To do
this, follow these steps:
• Close all open Internet Explorer windows
including this window
Note: You may want to print the following steps.
• Click Start, click Programs and right-click Internet
Explorer and click Run as Administrator
Note: Do not click Internet Explorer (64-bit).
• Select Allow if prompted
• Test Netflix with Silverlight to see if the
issue is resolved
7. Make sure the Time and Date are set correctly
To check the Time and Date, and then
adjust if needed, follow these steps:
• Right-click the clock in the bottom right-hand
corner of the task bar
• Click Change date and time
Note: For Windows XP users, click Adjust Date/Time
• Set the correct Time and Date and click OK
Note: For Windows XP, click Apply
• Test Netflix with Silverlight to see if the
issue is resolved
8. Turn off InPrivate web browsing
Turn on InPrivate Browsing to see if this
resolves the issue. To do this, follow these steps:
• Click the Safety button, and then
click InPrivate Browsing
• Open a new tab, and then, on the new tab page,
click Open an InPrivate Browsing window
• Press Ctrl+Shift+P
• Test Netflix with Silverlight to see if the
issue is resolved
9. Add Netflix to your trusted sites in Internet
Explorer
Adding Netflix to your trusted sites may
resolve the issue. To do this, follow these steps:
• In Internet Explorer, click
the Tools button or click the Tools menu option and
click Internet Options
• Select the Security tab
• Click Trusted Sites then select
the Sites button
• Uncheck Require server verification
• Delete anything related
to Netflix in the Website field
• Type *.netflix.com in the Add
this website to the zone field
• Click the Add button and then
click Close
• Test Netflix with Silverlight to see if the
issue is resolved
10. Ensure Application Storage is enabled
• Ensure that Application Storage is enabled. To
do this, follow these steps:
• Click the Start button and
type Silverlight in the Search box
• Click Microsoft Silverlight from the
list of programs
• Click the Application
Storage tab
• Make sure Enable Application
Storage box is checked
• Test Netflix with Silverlight to see if
the issue is resolved
11. Clear the Silverlight temporary files (Windows 7 and Windows
Vista)
Clear the Silverlight temporary files on
Windows 7 and Windows Vista. To do this, follow these steps:
• Close all open Internet Explorer windows
including this window
Note: You may want to print the following steps.
• Click Start then select Computer
• Open the C: drive (it may also
say Local Disk (C:)), open the Users Folder
• Open the folder that matches your username
(this will not be "Administrator" or "Default User")
• Open the AppData folder
• Open the LocalLow folder
Note: If you do not see the AppData folder, you need to enable
hidden files and folders. To do this, follow these steps:
Click the Organize menu at the top of the window, select Folder
and Search Options, click View tab, select the option
to Show Hidden Files and Folders, and then click OK.
Note: If you enable Show Hidden Files and Folders, make sure to
change back to Do Not Show Hidden Files and Folders.
• Open the Microsoft folder.
• Open the Silverlight folder.
• Right Click on the is folder and select
Delete.
• Test Netflix with Silverlight to see if the
issue is resolved
12. Clear the Silverlight temporary files (Windows XP only)
Clear the Silverlight temporary files on
Windows XP. To do this, follow these steps:
• Close all open Internet Explorer windows
including this window
Note: You may want to print the following steps.
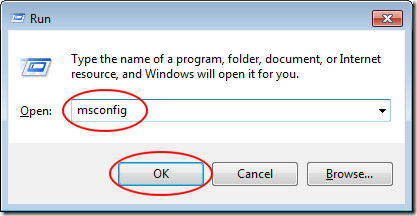
• Press and hold the Windows key and
tap the letter R on the keyboard at the same time. This displays
the Run window
• Type %userprofile% and
select OK
• Open the Local Settings folder
Note: If you do not see the Local Settings folder, you may need
to enable hidden files and folders: To do this, follow these steps:
Click Tools, click Folder Options, click the View tab, select
the option to Show Hidden Files and Folders, and then clickOK and
open the Local Settings folder.
Note: If you enable Show Hidden Files and Folders, make sure to
change back to Do Not Show Hidden Files and Folders.
• Open the Application Data folder
• Open the Microsoft folder
• Open the Silverlight folder
• Right-click on the is folder and
choose Delete
• Test Netflix with Silverlight to see if the
issue is resolved.